Prefinishing Platinum
Quality Assurance Benchmarks highlight workmanship of semi-finished and finished jewelry. Learn best practices for prefinishing platinum jewelry.


Prefinishing: Quality Assurance Benchmarking
Little or no metal should be removed during the three steps of prefinishing platinum jewelry. If removing a small amount of metal is necessary, take the following precautions.

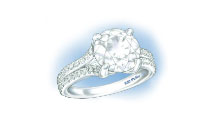
Platinum rings must be rounded prior to prefinishing

Maintain Design Elements and Engineering Detail

Prefinish all small, hard-to-access areas

Maintain Dimensions

Shape Retention: Maintain Flat Areas

Prefinishing: Tools and Techniques
Initial Prefinishing Steps

Abrasive Wheels

Abrasive Bands

Abrasive Papers and Film

.


.jpg "Learn how to evaluate the quality of a platinum ring that has been prefinished, polished, and buffed.")
